Creating a SAFE Stack App from Scratch
This article shows the steps required in order to create a SAFE Stack 5-style app from scratch. This repository should be used as a guide to follow whilst reading this tutorial; each section links to a specific commit from the history of the repository.
1. Folders and tools
This first section creates some basic folders and tools that will simply coding going forwards and represents some best practices.
1.1 Create a basic source-controlled repository
- Create a new folder.
- Put the folder under source controlled:
git init - We recommend also creating a
.gitignorefile to ensure that you do not accidentally commit unnecessary files into your repository. This example file has been generated through VS Code and fine-tuned with extra files / folders required for SAFE Stack applications.
1.2 Set up basic tooling support
- Create standard dotnet tooling support with `dotnet new tool-manifest`.
- Install the Fantomas tool for F# formatting.
dotnet tool install fantomas - We also recommend creating an
.editorconfigfile which configures Fantomas as required for optimal F# formatting. - You should also create a basic
global.jsonfile to pin the repository to a specific version of .NET.dotnet new global.json
2. Creating client & server
Now that we have basic core tools installed, we can go about creating a basic F# server and client and get them communicating with one another.
2.1 Create a basic server application
- Create a folder e.g.
server. - Create a plain F# console application
dotnet new console -lang F# - Reference the Giraffe NuGet package (if you wish to use Paket, feel free to install that tool at this point).
- Create a basic Giraffe application to e.g. simply return the text "Hello world!" for every request.
- Run the application and confirm that it returns the expected text.
dotnet run
2.2 Create a basic client application
- Create a folder e.g.
client. - Create another plain F# console application in it.
- Add the Fable dotnet tool.
dotnet tool install fable - To prove that Fable is installed, you should now be able to transpile the stock "Hello from F#" console app into JavaScript.
dotnet fable
2.3 Create a basic web application
Now that we have a running HTTP server and the ability to create JS from F#, we can now install the required browser libraries and tools required to host a full app in the browser.
- Create an
index.htmlfile that will be used as the launch point for the web application; it will also load the JS that is generated by Fable. - Install Vite with npm (install NPM and Node if you haven't already!).
npm install viteVite is a multi-purpose tool used to aid development and packaging of JavaScript applications.
-
You can now launch the application.
This command tells Fable to compile all F# into thedotnet fable watch -o output -s --run npx viteoutputfolder and then launches Vite, which acts as a local development web server. -
You should see output in your terminal similar to this:
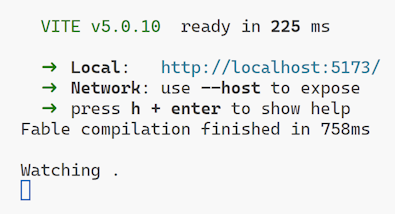
- Browse to the Local URI displayed e.g.
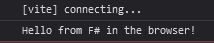
http://localhost:5173in your browser and view the console output using the dev console (normallyF12). You should see the console output from your client'sProgram.fse.g.
2.4 Set up basic Client / Server communication
Now that we have running client and server F# applications, let's have them communicate with each other over HTTP. We'll use a basic library for this called SimpleHttp.
- Start by adding a configuration file for Vite,
vite.config.mtswhich will tell it to redirect traffic destined for the server (which we assume always starts with/api/) to port 5000 (which is the port the server runs on).See here for more information about this redirection process.
- Add a simple button to the HTML which we will be using handle the "on click" event to communicate with the server.
- Add the Fable.SimpleHttp package to the Client project.
- Change your Client
Program.fsto handle the on-click event of the button so that when it is clicked, it makes a request to e.g./api/dataand puts the response in the console and a browser alert. - Start both client and server applications.
- Confirm that when you click the button in the browser, you get the response "Hello world" (sent from the server).
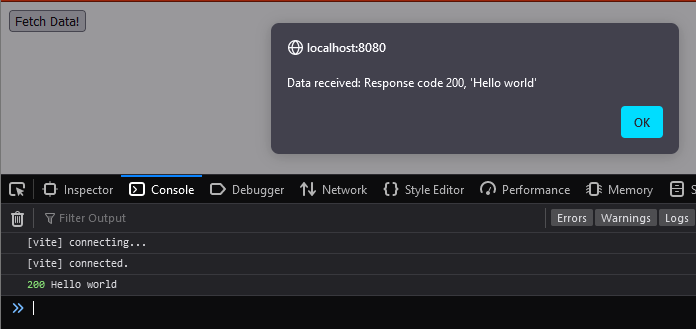
Congratulations! At this stage, you have a working F# client / server application that can communicate over HTTP.
3. Adding React
We now spend the next few steps getting React working within the app and with F# support.
3.1 Add basic React support
Now that we have a (very) basic F# client/server app, we'll now add support for React - a front-end framework that will enable us to create responsive and rich UIs.
- Add the react and react-dom packages to your NPM dependencies.
- Add the @vitejs/plugin-react and remotedev packages to your NPM dev dependencies.
- Add react to the list of plugins in your vite config.
3.2 Add F# React support
Now that we have React added to our application, we can add the appropriate F# libraries such as Feliz to start to use React in a typesafe, F#-friendly manner.
- Add the Feliz NuGet package to the Client project.
- Remove the
<button>element from theindex.html- we'll be creating it dynamically with React from now on. - Add an empty
<div>with an namedidto the body of theindex.html. This will be the "root" element that React will attach to from which to make HTML elements. - Using the Feliz React wrapper types, replace the contents of your
Program.fsin the Client project so that it creates a React button that can behave as the original static HTML button.
3.3 Add JSX support (optional)
This next step adds Feliz's JSX support, which allows you to embed standard React JSX code directly in your F# applications.
- Add the Fable.Core and Feliz.Jsx.React NuGet packages to the Client project.
- Instead of using the Feliz F# dialect for React components (such as the
button []element), use standard JSX code with string interpolation. - Reference
Program.jsxinstead ofProgram.jsin yourindex.htmlfile. - Run the client application using the extra flag that instructs Fable to emit
.jsxinstead of.jsfiles:
dotnet fable watch -o output -s -e .jsx --run npx vite
4. Taking advantage of F#
This next section takes advantage of F#'s typing for both client and server.
4.1 Add type-safe Client / Server communication
- On the Server:
- Add the Fable.Remoting.Giraffe package.
- Create a new folder,
shared, and aContracts.fsfile inside it. - Reference this file from both Client and Server projects.
- Inside this file create an API type and a Route builder to be used by Fable Remoting (so that client and server can route traffic).
- On the Server, create an implementation of the Api you just defined, convert it to an Http Handler and replace the
text "Hello world"call with it.
- On the Client:
- Add the Fable.Remoting.Client package.
- Instead of using SimpleHttp to make client / server calls, create a Fable Remoting API proxy and use that.
4.2 Add Elmish support
Elmish is an F# library modelled closely on the Elm language model for writing browser-based applications, which has popularised the "model-view-update" paradigm.
- Add the Fable.Elmish.Debugger, Fable.Elmish.HMR and Fable.Elmish.React packages.
- Create a set of standard model, view and update types functions.
- Update your basic application root to use Elmish instead of a "raw" ReactDOM root.
- Ensure you add the required polyfill for remotedev in
index.html.
5. More UI capabilities
This last section adds more UX capabilities.
5.1 Add Tailwind support
Follow the Tailwind guide to add Tailwind to your project.
5.2 Revert to "standard" F# Feliz (optional)
If you do not want to use the JSX support:
- Remove references to Feliz.JSX
- Do not use
JSX.jsxto create components but rather standard[ReactComponent]. - Use the standard Feliz types for creating standard React elements such as
divandbuttonetc.