Using SQLProvider SQL Server SSDT
Set up your database Server using Docker
The easiest way to get a database running locally is using Docker. You can find the installer on their website. Once docker is installed, use the following command to spin up a database server
docker run -e "ACCEPT_EULA=Y" -e "MSSQL_SA_PASSWORD=<your password>" -p 1433:1433 -d mcr.microsoft.com/mssql/server:2022-latest
Creating a "SafeTodo" Database with Azure Data Studio
Connecting to a SQL Server Instance
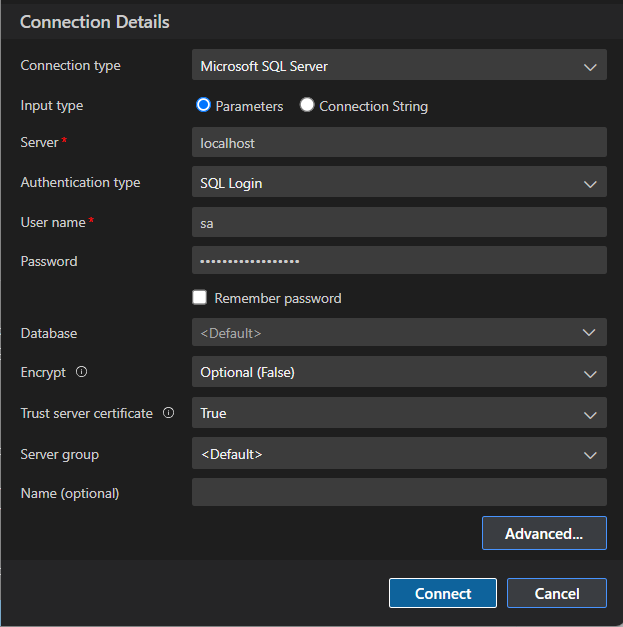
1) In the "Connections" tab, click the "New Connection" button

2) Enter your connection details, leaving the "Database" dropdown set to <Default>.
Creating a new "SafeTodo" Database
- Right click your server and choose "New Query"
- Execute this script:
USE master
GO
IF NOT EXISTS (
 SELECT name
 FROM sys.databases
 WHERE name = N'SafeTodo'
)
 CREATE DATABASE [SafeTodo];
GO
IF SERVERPROPERTY('ProductVersion') > '12'
 ALTER DATABASE [SafeTodo] SET QUERY_STORE=ON;
GO
- Right-click the "Databases" folder and choose "Refresh" to see the new database.
NOTE: Alternatively, if you don't want to manually create the new database, you can install the "New Database" extension in Azure Data Studio which gives you a "New Database" option when right clicking the "Databases" folder.
Create a "Todos" Table
- Right-click on the SafeTodo database and choose "New Query"
- Execute this script:
CREATE TABLE [dbo].[Todos]
(
  [Id] UNIQUEIDENTIFIER NOT NULL PRIMARY KEY,
  [Description] NVARCHAR(500) NOT NULL,
  [IsDone] BIT NOT NULL
)
Creating an SSDT Project (.sqlproj)
At this point, you should have a SAFE Stack solution and a minimal "SafeTodo" SQL Server database with a "Todos" table. Next, we will use Azure Data Studio with the "SQL Database Projects" extension to create a new SSDT (SQL Server Data Tools) .sqlproj that will live in our SAFE Stack .sln.
1) Install the "SQL Database Projects" extension.
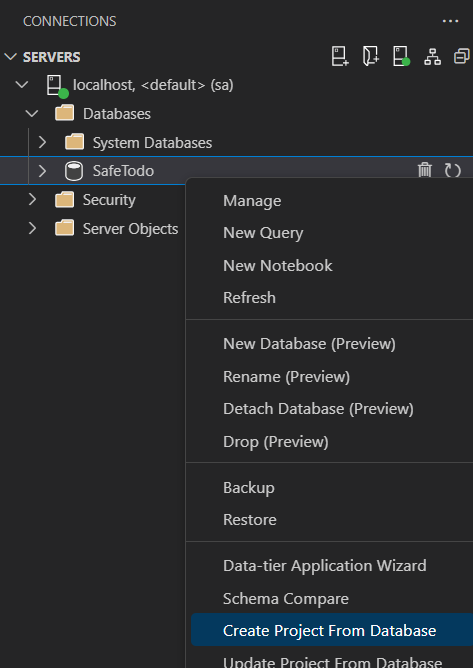
2) Right click the SafeTodo database and choose "Create Project From Database" (this option is added by the "SQL Database Projects" extension)
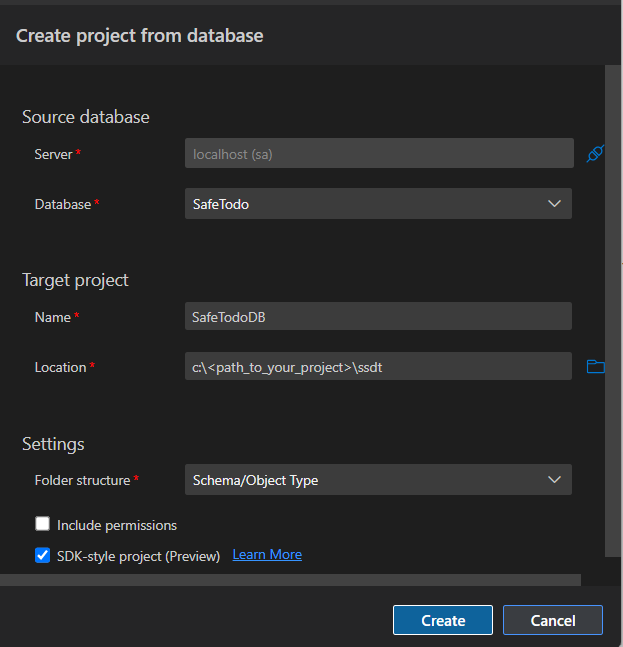
3) Configure a path within your SAFE Stack solution folder and a project name and then click "Create". NOTE: If you choose to create an "ssdt" subfolder as I did, you will need to manually create this subfolder first.
4) You should now be able to view your SQL Project by clicking the "Projects" tab in Azure Data Studio.
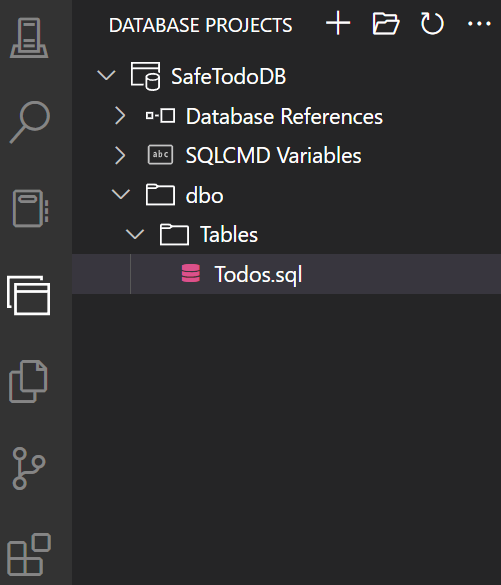
5) Finally, right click the SafeTodoDB project and select "Build". This will create a .dacpac file which we will use in the next step.
Create a TodoRepository Using the new SSDT provider in SQLProvider
Installing SQLProvider from NuGet
Install dependencies SqlProvider and Microsoft.Data.SqlClient
dotnet paket add SqlProvider -p Server
dotnet paket add Microsoft.Data.SqlClient -p Server
Initialize Type Provider
Next, we will wire up our type provider to generate database types based on the compiled .dacpac file.
1) In the Server project, create a new file, Database.fs. (this should be above Server.fs).
module Database
open FSharp.Data.Sql

[<Literal>]
let SsdtPath = __SOURCE_DIRECTORY__ + @"/../../ssdt/SafeTodoDB/bin/Debug/SafeTodoDB.dacpac"

type DB =
    SqlDataProvider<
        Common.DatabaseProviderTypes.MSSQLSERVER_SSDT,
        SsdtPath = SsdtPath,
        UseOptionTypes = Common.NullableColumnType.OPTION
    >

//TO RELOAD SCHEMA: 1) uncomment the line below; 2) save; 3) recomment; 4) save again and wait.
//DB.GetDataContext().``Design Time Commands``.ClearDatabaseSchemaCache

let createContext (connectionString: string) =
    DB.GetDataContext(connectionString)
2) Create TodoRepository.fs below Database.fs.
module TodoRepository
open FSharp.Data.Sql
open Database
open Shared

/// Get all todos that have not been marked as "done".
let getTodos (db: DB.dataContext) =
    query {
        for todo in db.Dbo.Todos do
        where (not todo.IsDone)
        select
            { Shared.Todo.Id = todo.Id
              Shared.Todo.Description = todo.Description }
    }
    |> List.executeQueryAsync

let addTodo (db: DB.dataContext) (todo: Shared.Todo) =
    async {
        let t = db.Dbo.Todos.Create()
        t.Id <- todo.Id
        t.Description <- todo.Description
        t.IsDone <- false

        do! db.SubmitUpdatesAsync() |> Async.AwaitTask
    }
3) Create TodoController.fs below TodoRepository.fs.
module TodoController
open Database
open Shared

let getTodos (db: DB.dataContext) =
    TodoRepository.getTodos db |> Async.AwaitTask

let addTodo (db: DB.dataContext) (todo: Todo) =
    async {
        if Todo.isValid todo.Description then
            do! TodoRepository.addTodo db todo
            return todo
        else
            return failwith "Invalid todo"
    }
4) Finally, replace the stubbed todosApi implementation in Server.fs with our type provided implementation.
module Server

open Fable.Remoting.Server
open Fable.Remoting.Giraffe
open Saturn
open System
open Shared
open Microsoft.AspNetCore.Http

let todosApi =
    let db = Database.createContext @"Data Source=localhost,1433;Database=SafeTodo;User ID=sa;Password=<your password>;TrustServerCertificate=True"
    { getTodos = fun () -> TodoController.getTodos db
      addTodo = TodoController.addTodo db }

let webApp =
    Remoting.createApi()
    |> Remoting.withRouteBuilder Route.builder
    |> Remoting.fromValue todosApi
    |> Remoting.withErrorHandler fableRemotingErrorHandler
    |> Remoting.buildHttpHandler

let app =
    application {
        use_router webApp
        memory_cache
        use_static "public"
        use_gzip
    }

run app
Run the App!
From the VS Code terminal in the SafeTodo folder, launch the app (server and client):
dotnet run
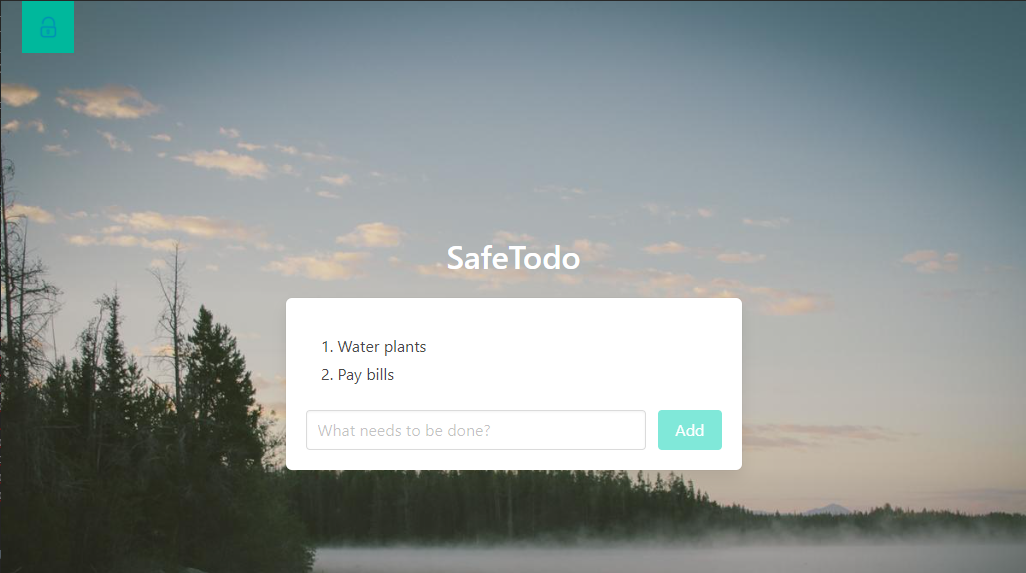
You should now be able to add todos.
Deployment
When creating a Release build for deployment, it is important to note that SQLProvider SSDT expects that the .dacpac file will be copied to the deployed Server project bin folder.
Here are the steps to accomplish this:
1) Modify your Server.fsproj to include the .dacpac file with "CopyToOutputDirectory" to ensure that the .dacpac file will always exist in the Server project bin folder.
<ItemGroup>
    <None Include="..\{relative path to SSDT project}\ssdt\SafeTodo\bin\$(Configuration)\SafeTodoDB.dacpac" Link="SafeTodoDB.dacpac">
        <CopyToOutputDirectory>PreserveNewest</CopyToOutputDirectory>
    </None>

    { other files... }
</ItemGroup>
2) In your Server.Database.fs file, you should also modify the SsdtPath binding so that it can build the project in either Debug or Release mode:
[<Literal>]
#if DEBUG
let SsdtPath = __SOURCE_DIRECTORY__ + @"/../../ssdt/SafeTodoDB/bin/Debug/SafeTodoDB.dacpac"
#else
let SsdtPath = __SOURCE_DIRECTORY__ + @"/../../ssdt/SafeTodoDB/bin/Release/SafeTodoDB.dacpac"
#endif
NOTE: This assumes that your SSDT .sqlproj will be built in Release mode (you can build it manually, or use a FAKE build script to handle this).